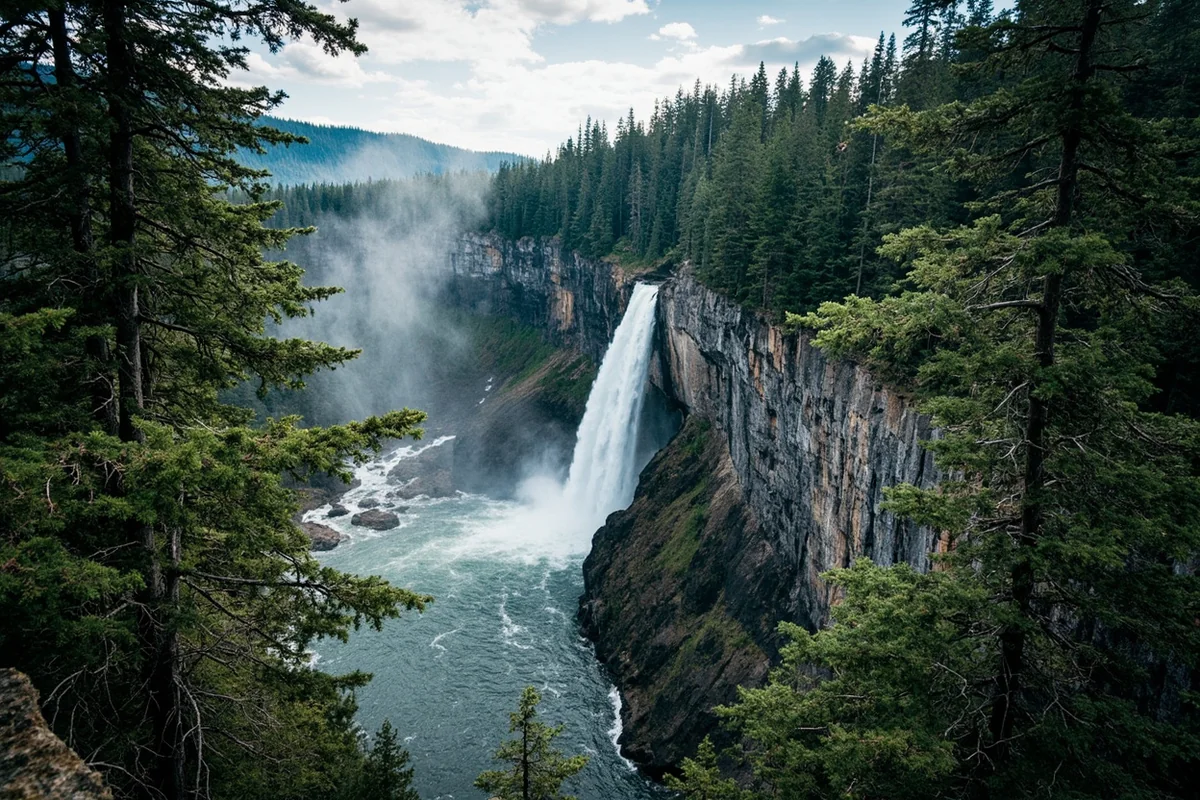
The moment I rounded the final switchback and heard the thunderous roar echoing off the canyon walls, I knew Miche Wabun Falls was about to become one of my favorite discoveries in Glacier National Park.
This lesser-known cascade, tucked away on the park’s east side, rewards hikers with a spectacle that rivals the more famous falls—minus the crowds fighting for photo ops.
If you’re exploring Montana waterfalls and want something beyond the typical tourist stops, Miche Wabun Falls deserves a prominent spot on your itinerary.
During my visit last July, I encountered only three other groups the entire day—a stark contrast to the packed viewpoints at more popular destinations.
- Miche Wabun Falls is a 40-foot cascade located in Glacier National Park’s Two Medicine Valley
- The hike is approximately 5.4 miles round trip via the Dawson Pass Trail
- Best visited June through September when the trail is snow-free
- Moderate difficulty with 1,400 feet of elevation gain
- Much less crowded than popular falls like Saint Mary Falls
- Bear spray is essential—this is prime grizzly habitat
- Early morning visits offer the best lighting and wildlife viewing opportunities
What Makes Miche Wabun Falls Special
Miche Wabun Falls holds a unique place among Glacier’s many waterfalls. The name comes from the Blackfeet language, roughly translating to “beautiful” or referring to the morning wind—fitting for a cascade that catches the first rays of sunlight in spectacular fashion.
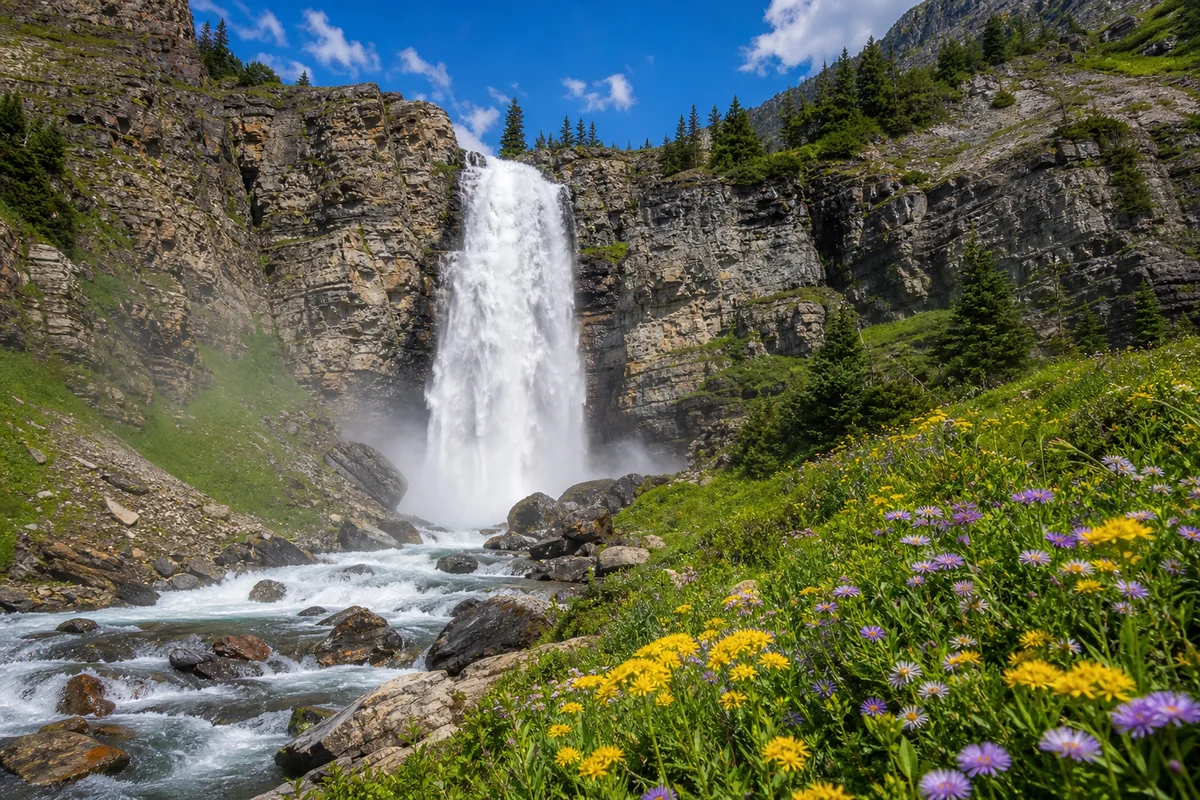
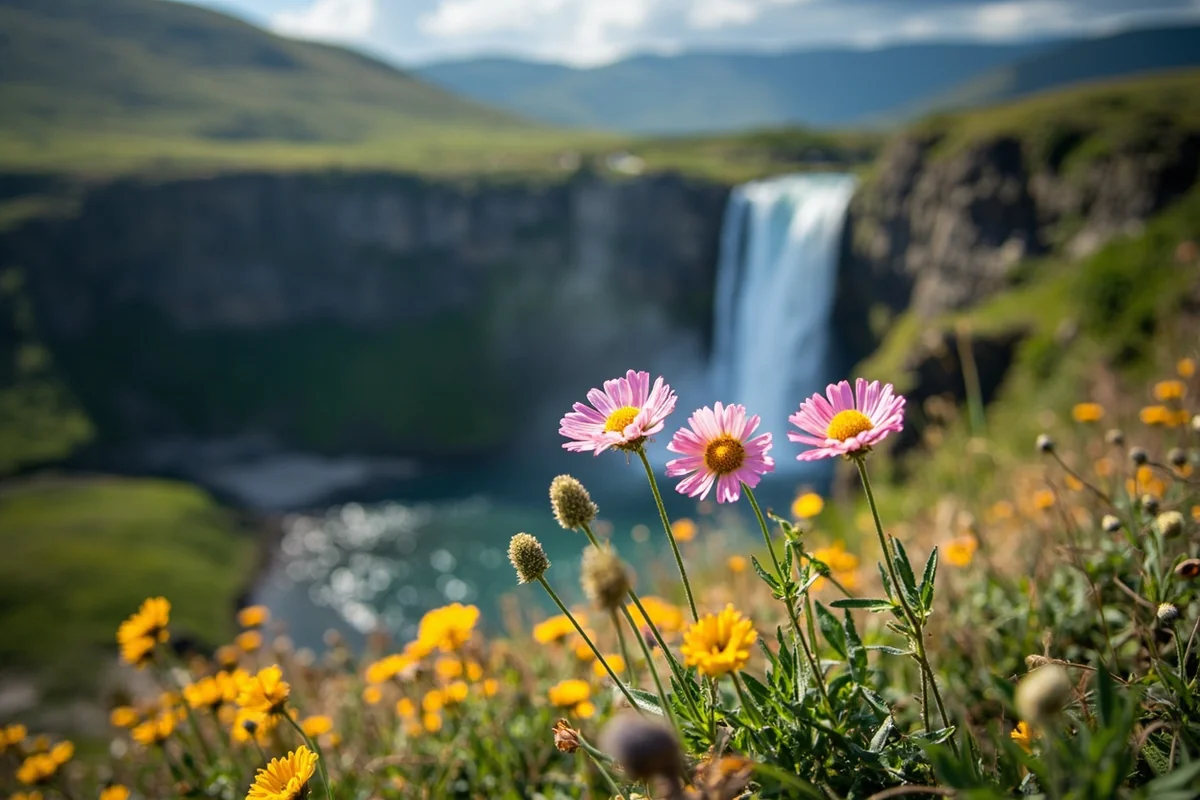
What struck me most during my hike wasn’t just the waterfall itself, but the entire journey leading up to it. The trail winds through diverse ecosystems, from dense lodgepole pine forests to open alpine meadows bursting with wildflowers in summer.
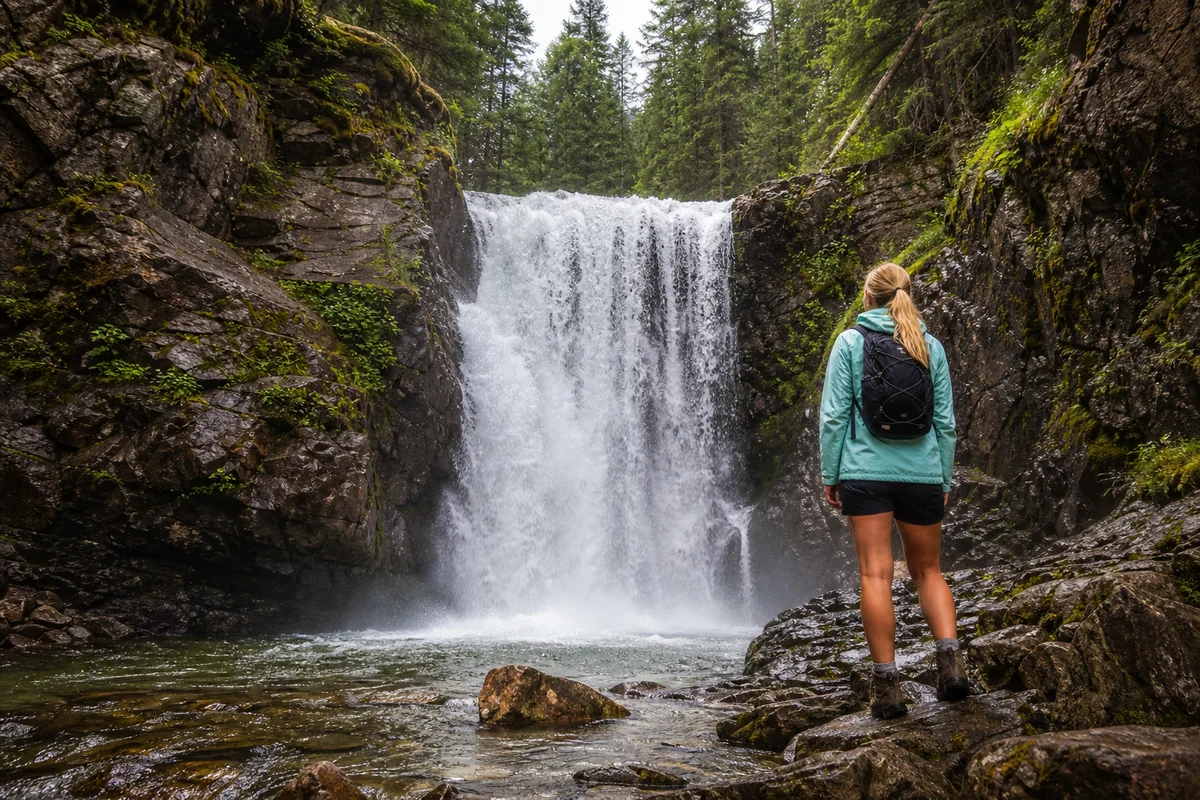
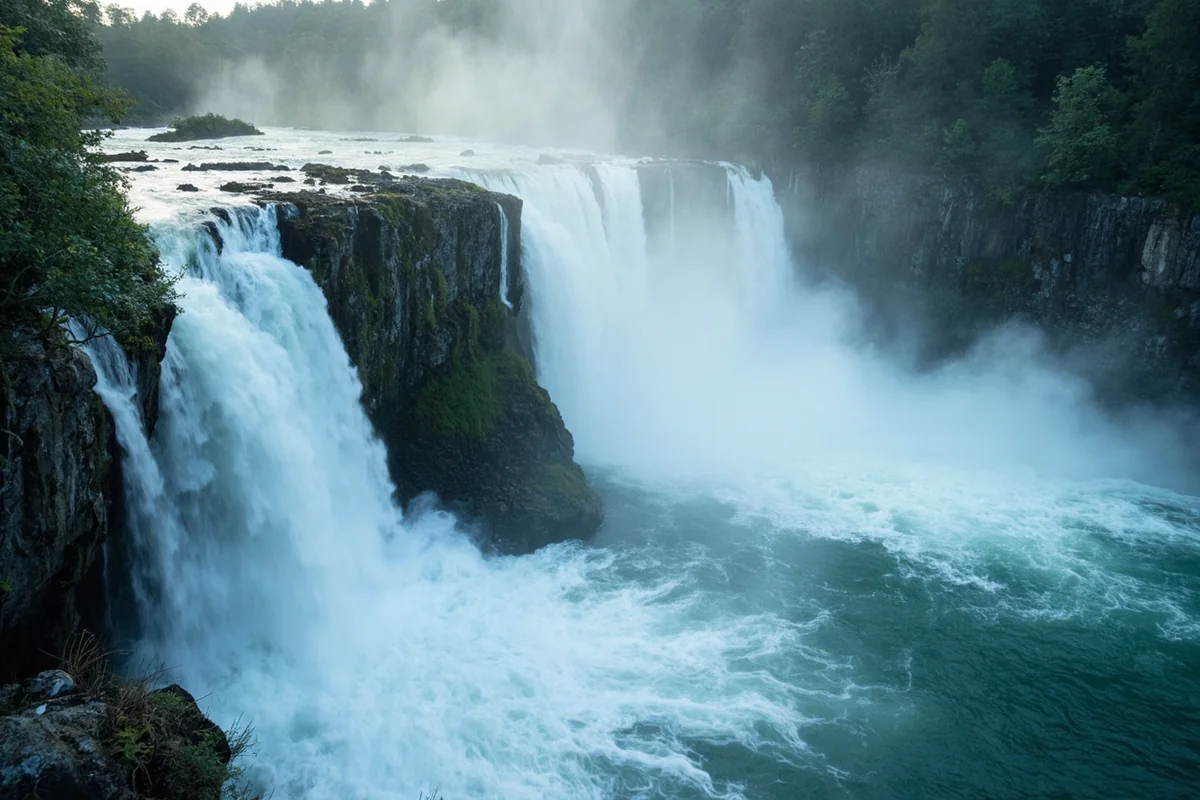
The falls themselves drop approximately 40 feet over a series of rocky ledges, creating that distinctive tiered appearance that photographers love. Unlike the single dramatic plunge you’ll find at places like Running Eagle Falls, Miche Wabun’s multi-tiered structure creates a more complex and visually interesting cascade.
Getting to the Trailhead
Reaching Miche Wabun Falls starts at the Two Medicine area of Glacier National Park. This section of the park sees significantly less traffic than the Going-to-the-Sun Road corridor, which works in your favor.
Driving Directions
From East Glacier Park Village, head north on Highway 49 for about 4 miles. Turn left onto Two Medicine Road and continue for approximately 7 miles until you reach the Two Medicine Lake area.
The road is paved and well-maintained, though it closes seasonally (typically late October through late May, depending on snowfall). I drove it in my standard sedan without any issues during my summer visit.
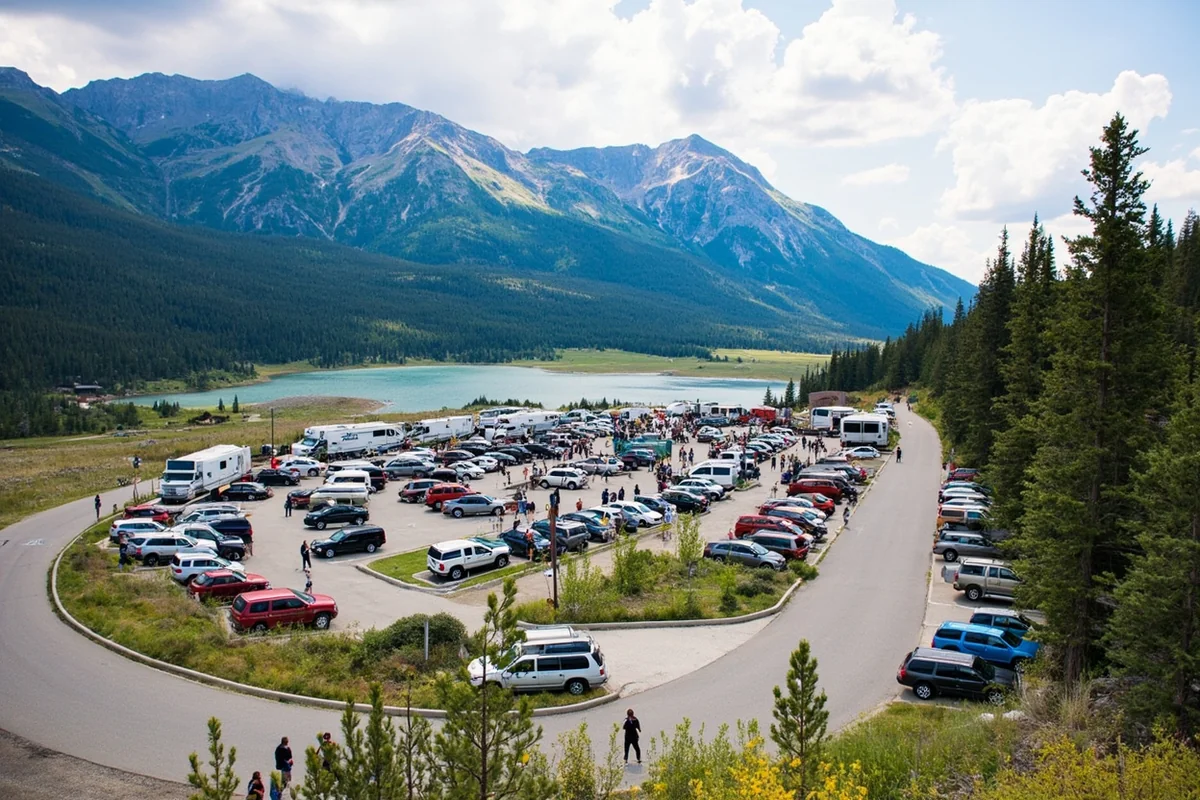
Park at the Two Medicine Lake parking area. During my July visit, the lot was about half full by 9 AM—a pleasant surprise compared to the Logan Pass chaos I’d experienced the day before.
Entrance Fees and Passes
You’ll need a valid Glacier National Park pass or an America the Beautiful annual pass. As of my last visit, the park entrance fee was $35 for a seven-day vehicle pass.
During peak season (late May through early September), you’ll also need a vehicle reservation for the Two Medicine area if arriving between 6 AM and 3 PM. I highly recommend securing this reservation at least a month in advance through Recreation.gov.
Trail Overview and What to Expect
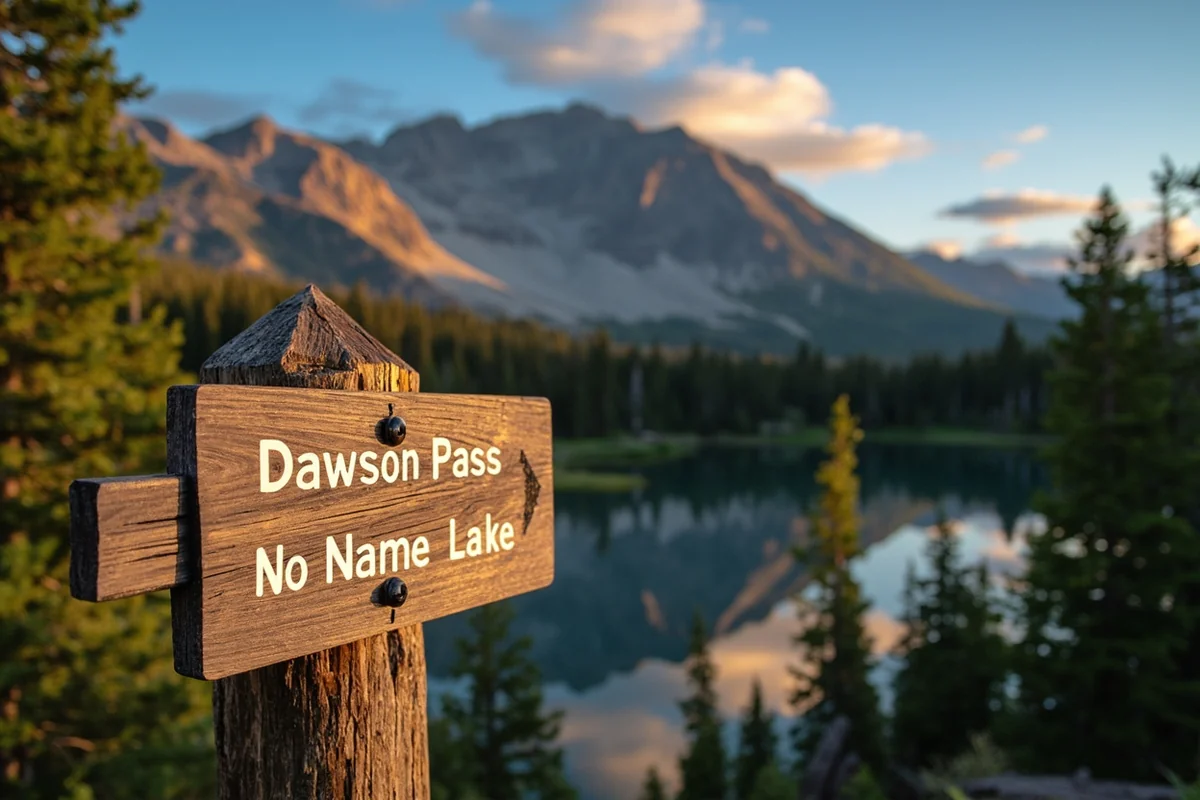
The hike to Miche Wabun Falls follows a portion of the Dawson Pass Trail, one of the classic routes in the Two Medicine Valley. Here’s what you need to know before setting out.
| Trail Detail | Information |
|---|---|
| Distance | 5.4 miles round trip |
| Elevation Gain | 1,400 feet |
| Difficulty | Moderate |
| Estimated Time | 3-4 hours |
| Trail Type | Out and back |
| Dog Friendly | No (national park regulations) |
Starting at South Shore Trailhead
The trail begins at the South Shore Trailhead, located near the Two Medicine campground. You can also take the historic boat shuttle across Two Medicine Lake to shorten your hike by about 2 miles each way—something I’d recommend if you’re short on time or want to save your energy for the climb.
The boat operates seasonally, typically from late June through early September. When I was there, departures ran every hour starting at 9 AM, with the last return boat at 5 PM. The cost was around $15 per adult for the round trip.
The First Section: Along Two Medicine Lake
If you skip the boat and hike the full distance, the first mile follows the southern shoreline of Two Medicine Lake. This section is relatively flat and offers stunning views across the water toward Rising Wolf Mountain.
I actually enjoyed this portion more than expected. The morning light reflecting off the lake’s turquoise surface made for incredible photos, and I spotted a moose feeding in the shallows near the halfway point.
The trail surface is well-maintained packed dirt with some rocky sections. My trail runners handled it fine, though I’d recommend lightweight hiking boots if you prefer more ankle support.
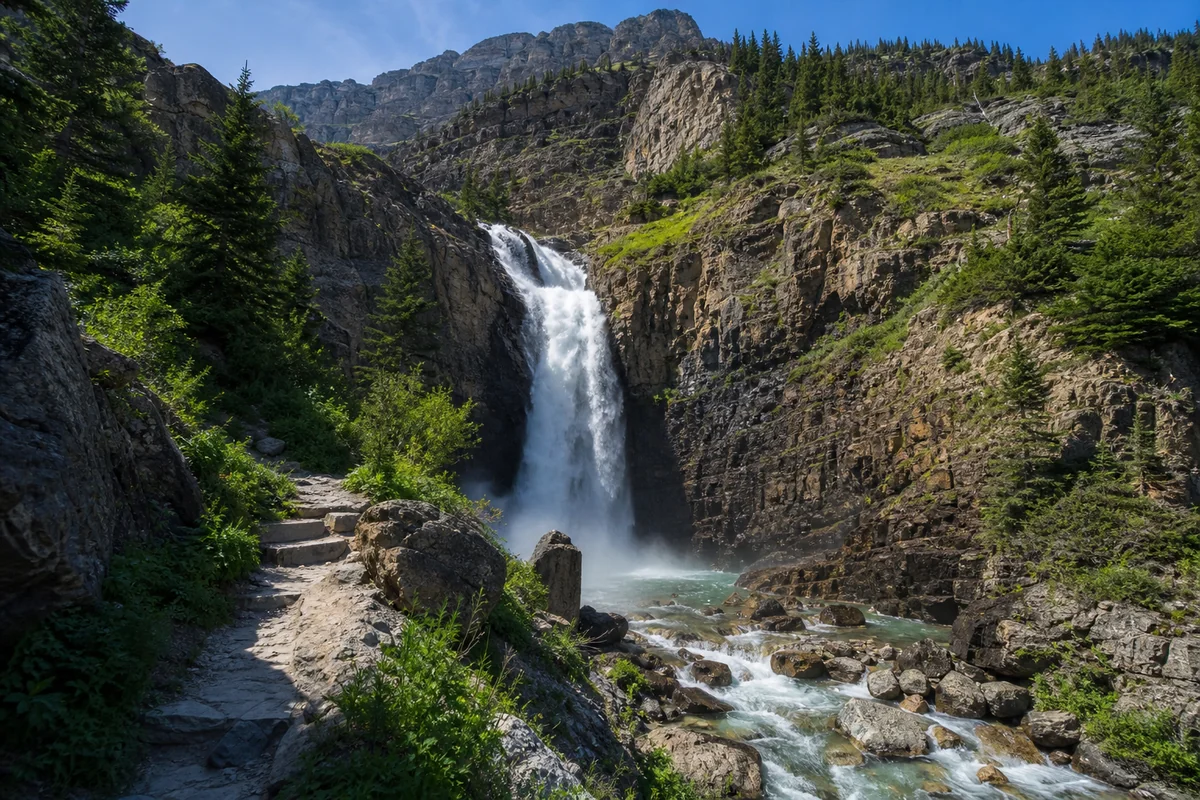
Climbing Toward the Falls
After passing the boat dock at the far end of the lake, the trail begins its ascent in earnest. This is where the real work starts, with a series of switchbacks climbing through mature forest.
The grade is steady but not brutal. I’d compare it to the climb at Morrell Falls in terms of effort—challenging enough to get your heart rate up, but not so steep that you’re gasping for air.
About 1.5 miles from the boat dock, you’ll reach a trail junction. Stay right toward Dawson Pass. The left fork leads to No Name Lake—another worthy destination if you have time for a longer adventure.
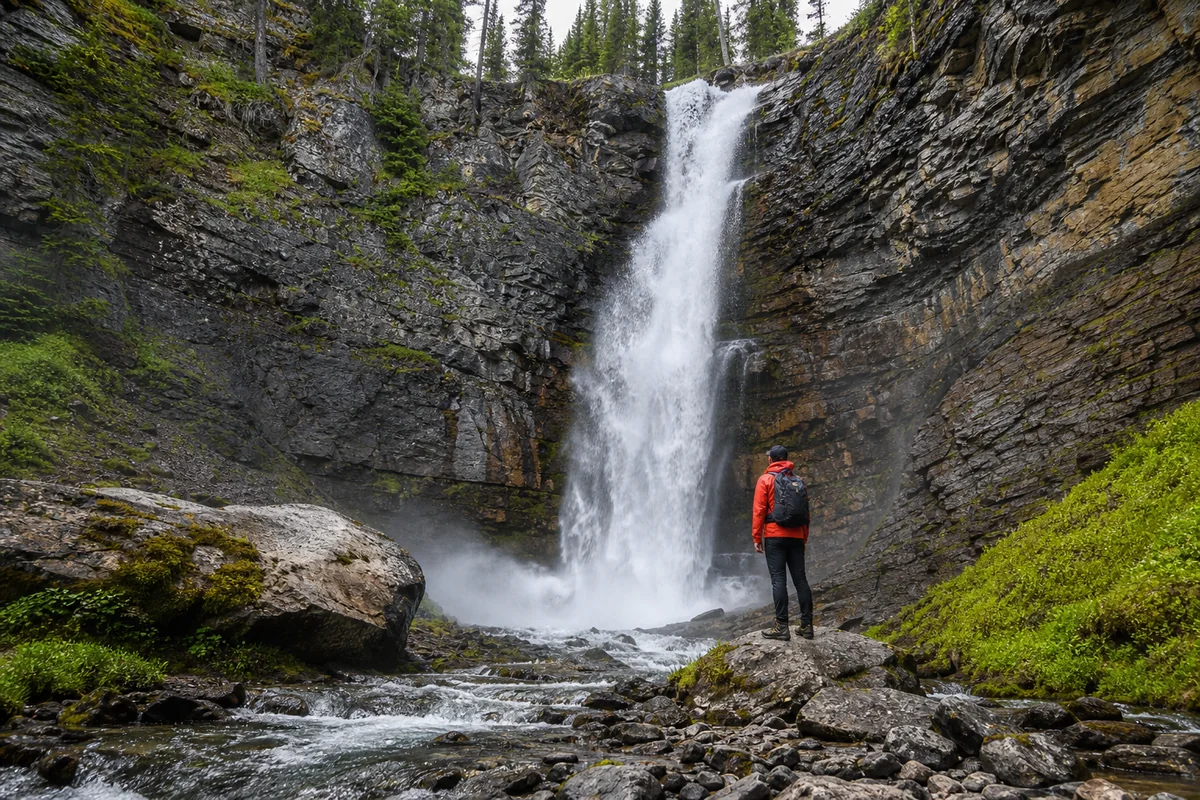
Arriving at Miche Wabun Falls
The falls appear somewhat suddenly as you round a bend in the trail. I actually heard them before I saw them—that distinctive white noise that grows louder with each step.
The Main Viewpoint
The trail passes directly in front of the falls, offering excellent views without requiring any off-trail scrambling. A small clearing near the base provides the perfect spot for photos and a snack break.
During my July visit, the water flow was impressive—fueled by snowmelt from the higher elevations. The spray reached the trail, creating a natural air conditioning effect that felt heavenly after the climb.
I spent about 45 minutes at the falls, exploring different vantage points and simply sitting on a flat rock, mesmerized by the cascading water. The constant motion and sound have a meditative quality that’s hard to describe until you experience it.
Getting Closer (Safely)
You can carefully approach the base of the falls over some rocky terrain, but use caution. The rocks near the water are perpetually wet and extremely slippery.
I watched one hiker take a tumble trying to get the perfect selfie—he was fine, just embarrassed and soggy. Learn from his mistake and prioritize steady footing over the ideal camera angle.
There’s no official viewing platform or railing here. It’s a wilderness waterfall experience, which means you’re responsible for your own safety.
Best Time to Visit Miche Wabun Falls
Timing your visit can significantly impact your experience. Here’s what I’ve learned from my own trip and talking with park rangers.
Seasonal Considerations
Late June through mid-July offers the best combination of factors: maximum water flow, wildflowers in bloom, and reasonably reliable weather. This was when I visited, and the falls were absolutely roaring.
August through September sees reduced water flow as the snowmelt diminishes, but the trails are drier and the crowds thin out even more. The falls are still beautiful, just not as dramatic.
Late September into October brings fall colors to the valley. The larches turn golden, creating stunning contrast against the evergreens. Water flow is at its lowest, but the photographic opportunities are unique.
Winter and early spring make this hike impractical for most visitors due to snow coverage and avalanche danger. The road to Two Medicine closes for the season.
Time of Day Matters
I started my hike at 7:30 AM and reached the falls around 10 AM. This timing worked perfectly—the sun had crested the eastern peaks but hadn’t yet created harsh shadows.
For photographers, early morning provides the softest light and often catches rainbows in the mist. I managed to capture a faint rainbow arc during my visit that made the early alarm worthwhile.
Late afternoon works well too, especially in July and August when days are long. Just make sure you have enough daylight for the return hike.
Wildlife Encounters and Safety
The Two Medicine area is prime wildlife habitat, and you should be prepared for potential encounters.
Bears Are Real—Be Prepared
I cannot stress this enough: carry bear spray and know how to use it. During my hike, I saw fresh grizzly scat on the trail about a mile before the falls.
The Two Medicine Valley supports healthy populations of both black bears and grizzlies. They’re most active during early morning and evening hours—exactly when serious hikers tend to be on the trail.
Make noise while hiking, especially in areas with limited visibility. I carry a small bear bell and chat with my hiking companions. If you’re solo, talking to yourself isn’t crazy—it’s smart.
Other Wildlife
Beyond bears, I spotted mountain goats on the rocky slopes above the falls during my visit. They’re remarkably agile, navigating terrain that looks impossible from below.
Mule deer, bighorn sheep, and various smaller mammals also call this area home. Keep your distance and never approach or feed wildlife—no matter how friendly they appear.
General Safety Tips
Weather in Glacier changes rapidly. I started my hike in sunshine and encountered a brief thunderstorm on the way down. Pack a rain layer regardless of the forecast.
Let someone know your hiking plans before you set out. Cell service is nonexistent throughout most of the Two Medicine area.
The stream crossings near the falls can be tricky during high water. If a crossing looks dangerous, turn back. No waterfall photo is worth risking your safety.

What to Bring
Proper gear makes the difference between an enjoyable hike and a miserable slog. Here’s my packing list based on personal experience.
Essential Items
- Bear spray – Carried on your hip or chest strap, not buried in your pack
- At least 2 liters of water – No reliable water sources until the falls
- Rain jacket – Even on sunny days
- Sunscreen and hat – The trail has exposed sections
- Trail snacks – I brought energy bars and dried fruit
- First aid kit – Basic supplies for blisters and minor injuries
- Navigation – Downloaded trail map on your phone (don’t rely on cell service)
Recommended Extras
- Trekking poles – Helpful on the descent
- Extra layers – Temperature drops significantly at the falls
- Waterproof camera bag – Mist from the falls can damage electronics
- Binoculars – For wildlife spotting
- Microspikes – If visiting early season when snow patches may remain
Footwear Recommendations
I wore Altra Lone Peak trail runners and had no issues. However, the rocky sections near the falls made me wish I’d brought my mid-height hiking boots for the extra ankle protection.
Whatever you choose, make sure your footwear is broken in and has good grip. Wet rocks near the waterfall are treacherous in smooth-soled shoes.
Photography Tips
Miche Wabun Falls offers excellent photo opportunities for all skill levels. Here’s what worked for me.
Camera Settings
For that silky smooth water effect, use a slow shutter speed (1/4 second or slower). You’ll need a tripod and possibly a neutral density filter if shooting during daylight.
For freezing the water droplets, bump your shutter speed to 1/500 or faster. This creates a more dramatic, powerful look that I personally prefer for cascading falls like this.
Composition Ideas
Include some foreground elements—wildflowers, rocks, or fallen logs—to add depth to your shots. The clearing near the base has several natural framing options.
Don’t forget to capture the wider scene. The surrounding mountains and forest provide context that makes Miche Wabun Falls unique compared to other cascades you might photograph.
I shot both horizontal and vertical orientations and ended up preferring the verticals for this particular waterfall. The tiered structure lends itself well to portrait format.
Protecting Your Gear
The mist from the falls is constant. Bring a lens cloth and consider a rain sleeve for your camera if you plan extended shooting sessions.
I learned this the hard way after spending twenty minutes wiping water droplets off my lens. A microfiber cloth dedicated solely to this purpose is worth its negligible weight.
Combining with Other Attractions
The Two Medicine Valley offers enough activities to fill an entire day or more. Here are some ways to extend your adventure.
Boat Tour on Two Medicine Lake
Even if you hike to the falls without using the boat shuttle, consider taking a separate scenic cruise. The 45-minute tours offered by Glacier Park Boat Company include ranger-guided commentary about the area’s geology and history.
I did the evening cruise after my hike and gained a whole new appreciation for the landscape I’d just traversed.
Additional Hikes Nearby
Running Eagle Falls makes an easy add-on—it’s only a 0.6-mile round trip from a separate parking area. Also known as Trick Falls, this unique cascade actually has water flowing through an opening in the cliff during certain water levels.
For a longer adventure, continue past Miche Wabun toward Dawson Pass for expansive views into the Nyack Creek drainage. Be warned: this adds significant mileage and elevation.
Two Medicine Campground
If you want to make it a multi-day trip, Two Medicine Campground offers 99 sites on a first-come, first-served basis. The campground usually fills by early afternoon during peak season, so arrive early.
Staying overnight allowed me to catch sunrise on Two Medicine Lake—an experience that rivaled the waterfall itself for sheer beauty.
Comparing to Other Montana Waterfalls
Having visited dozens of waterfalls across the state, I can offer some perspective on where Miche Wabun Falls fits in the hierarchy.
Versus Popular Glacier Falls
Compared to Saint Mary Falls or McDonald Falls, Miche Wabun receives a fraction of the visitors. This solitude is its greatest asset for those seeking a more intimate wilderness experience.
Grotto Falls in Hyalite Canyon offers a similar moderate-difficulty experience but without the national park fees and reservation requirements.
For Waterfall Chasers
If you’re building a Montana waterfall bucket list, Miche Wabun Falls deserves inclusion alongside heavy hitters like Kootenai Falls and Holland Lake Falls.
The combination of scenic approach, dramatic setting, and relative solitude puts it in a special category. It’s not the tallest or most powerful, but it offers one of the most complete waterfall experiences I’ve found in the state.
For similar off-the-beaten-path cascades, consider Needle Falls or the remote Passage Creek Falls.
Common Mistakes to Avoid
After my visit and conversations with rangers, here are the pitfalls I’d warn other hikers about.
Underestimating the Distance
Many visitors assume any waterfall hike in Glacier will be short and easy. Miche Wabun requires real effort. I watched several unprepared groups turn back before reaching the falls, disappointed and exhausted.
Check the mileage and elevation gain before committing. If you’re not comfortable with a 5+ mile hike with significant climbing, consider the shorter trails to Running Eagle Falls or Redrock Falls instead.
Forgetting About Reservations
The vehicle reservation system catches many visitors off guard. I met a frustrated family in the parking lot who’d driven from Ohio specifically to visit Two Medicine—only to be turned away because they didn’t have a reservation.
Check the current reservation requirements on the Glacier National Park website before your trip. Requirements change seasonally and sometimes annually.
Starting Too Late
Summer days are long, but starting after noon limits your flexibility. If the weather turns or you want to explore beyond the falls, you’ll feel rushed.
My 7:30 AM start gave me plenty of time to enjoy the experience without watching the clock.
Ignoring Weather Forecasts
Mountain weather is notoriously unpredictable, but checking forecasts still helps. The day before my visit, severe thunderstorms rolled through in the afternoon. Hikers caught above treeline had a terrifying experience.
I planned my hike for the morning specifically because afternoon storms were predicted. Being flexible with timing can mean the difference between adventure and disaster.

Accessibility and Fitness Considerations
Let me be straightforward about what this hike requires.
Physical Demands
This is a moderate hike that will challenge casual walkers. The 1,400 feet of elevation gain means sustained uphill climbing—not technical, but tiring.
I consider myself moderately fit (I hike regularly but don’t train specifically), and I felt the burn on several switchbacks. My heart rate stayed elevated for much of the climb.
If you’re dealing with knee issues, the descent can be harder than the ascent. Trekking poles make a significant difference.
Altitude Considerations
The trailhead sits around 5,200 feet, with the falls at approximately 6,600 feet. Visitors from low elevations may notice the thinner air.
I’m from the Midwest and definitely felt some altitude effects—slightly shorter breath and slower pace than I’d expect at sea level. Stay hydrated and don’t push too hard.
Not Wheelchair or Stroller Accessible
The trail to Miche Wabun Falls is not accessible for wheelchairs, strollers, or those with significant mobility limitations. The terrain includes rocks, roots, and steep sections.
For accessible waterfall viewing in Montana, consider Kootenai Falls, which has improved trails and viewing platforms.
Local Services and Amenities
Planning your trip means knowing what’s available (and what isn’t) near the trailhead.
Food and Supplies
The Two Medicine General Store, located near the campground, offers basic supplies, snacks, and some hot food items. It’s not a full grocery store—bring most of what you need.
East Glacier Park Village, about 11 miles from the trailhead, has more extensive services including restaurants, a small grocery store, and gas stations.
Lodging Options
Glacier Park Lodge in East Glacier offers historic charm and full amenities. I splurged on a night there after my camping adventure and appreciated the hot shower and restaurant meal.
Budget options include the Backpacker’s Inn hostel and several smaller motels in East Glacier. During peak season, book well in advance.
Emergency Services
The nearest hospital is in Browning, about 30 miles away. For emergencies in the backcountry, contact park rangers.
Two Medicine Ranger Station, located near the lake, can assist with less urgent issues and provide current trail conditions.
Final Thoughts and Recommendations
Miche Wabun Falls exceeded my expectations in every way. The hike offered the perfect balance of challenge and reward, delivering stunning scenery without the crushing crowds found elsewhere in Glacier.
If you’re the type of traveler who prefers authenticity over convenience—who values solitude over selfie crowds—this waterfall belongs on your list.
The Two Medicine Valley as a whole remains one of Glacier’s best-kept secrets. While everyone else fights for parking at Logan Pass, you can have life-changing experiences here with far less stress.
I’m already planning a return trip for fall when the larches turn golden. Some places reveal themselves slowly, rewarding repeated visits with new perspectives.
Whether Miche Wabun Falls becomes a bucket-list checkmark or the start of a deeper relationship with Montana’s wilderness depends entirely on the spirit you bring to it. Either way, you won’t be disappointed.
For more waterfall adventures across the state, check out our guides to Memorial Falls, Ousel Falls, and the spectacular Siksika Falls. Each offers something unique, and together they paint a picture of Montana’s incredible waterfall diversity.
Frequently Asked Questions
Where is Miche Wabun Falls located in Montana?
Miche Wabun Falls is located in Glacier National Park, along the Ptarmigan Trail near the Many Glacier area. The trailhead is approximately 12 miles from the town of Babb and about 150 miles northwest of Great Falls, Montana.
How long is the hike to Miche Wabun Falls in Glacier National Park?
The hike to Miche Wabun Falls is roughly 5 miles round trip with moderate elevation gain. I’d recommend allowing 3-4 hours for the complete trek, which gives you plenty of time to enjoy the scenery and spend time at the falls.
What is the best time of year to visit Miche Wabun Falls Montana?
The best time to visit Miche Wabun Falls is late June through early September when the trail is typically snow-free and accessible. I prefer visiting in late spring or early summer when snowmelt creates the most powerful water flow, making the falls especially impressive.
Do I need a park pass to see Miche Wabun Falls?
Yes, you’ll need a Glacier National Park entrance pass which costs $35 per vehicle for a 7-day pass, or you can use an America the Beautiful annual pass ($80). During peak summer months, you may also need a vehicle reservation for the Many Glacier area, so check the park website before your trip.
What should I bring on the Miche Wabun Falls hike?
Pack bear spray (essential in Glacier), plenty of water, layered clothing, and sturdy hiking boots with ankle support. I always carry a rain jacket since mountain weather changes quickly, plus snacks and a camera because the views along this trail are absolutely stunning.
Is the Miche Wabun Falls trail suitable for beginners?
The trail to Miche Wabun Falls is rated moderate and suitable for hikers with some experience and reasonable fitness levels. The path has rocky sections and steady elevation gain, so it’s not ideal for young children or those with mobility concerns, but most active adults handle it well.
Are there grizzly bears near Miche Wabun Falls trail?
Yes, the Many Glacier area has one of the highest concentrations of grizzly bears in the lower 48 states. Always carry bear spray, hike in groups, make noise on the trail, and store food properly—I’ve encountered bears in this area, so wildlife awareness is absolutely critical.
Sources